
No More Complaining
Enough of this complaining about my home situation! Everyone has problems, so CHILL, Lawrence. Let's get back to what we all love — photography.
Second Passes
I want to talk about finding hidden gems on your hard drive. We all have them. I certainly do and you probably do, too.
In our rush to find the best images from a recent shoot (or one from some time ago), we often will miss some truly wonderful images that might take a little more polishing than the obvious ones we find on our CF or SD cards.
Pulling back highlights, opening up shadows, cropping slightly different than usual, settling for a smaller print — or a web-only sized image, or masking parts of an image for use in a composite. . . these are all legitimate ways to reclaim images that previously we might have thought of as culls.
Don't Overlook the Mundane
Let me give you an example. I recently had some time on my hands (while I couldn't cook or take a hot shower because the gas was off) and I opened up an old Lightroom catalog of images. They had been shot a few years ago during the annual artwalk in Alpine, a small town in west Texas, near the storied town of Marfa.
I had photographed activities throughout the day and evening in Alpine and had a variety of images from which to select.
A couple of photos were taken at night under artificial light, both tungsten and my off-camera flash. (Carrying around a small softbox on a small lightstand is a burden well worth the extra effort.)
These photos were of rather mundane goings-on: families coming and going from a lemonade stand, standing around, talking about nothing in particular. But I thought they deserved more attention than they might normally receive in these shortened-attention-span times of ours.
Let's take a look at the first photographs, a series of three images.


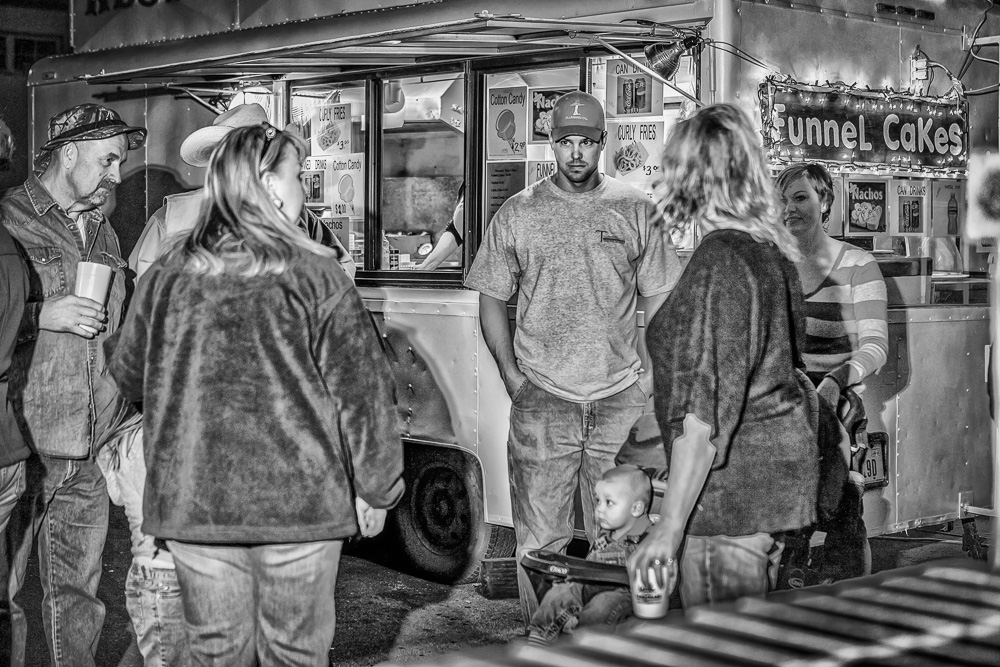


First, I played with contrast and clarity, mostly in preparation for the next step. I wanted to flatten things out a bit and add a bit of structure with the clarity tool.
Second, I stripped the color out in Nik Silver Efex Pro (one of my favorite tools), added more structure overall, and popped on a few control points to play with contrast and structure on a localized basis.
This is a look that is not for everyone but that's a discussion for another time and day. I believe, however, that it emphasizes texture and structure and can draw in the viewer to examine an image that might otherwise be overlooked.
The next images are a couple of portraits, that I treated very differently.


The first, a photo of an older Hispanic man I happened upon who immediately reminded me of the Corey Hart song from the mid-80's, Sunglasses at Night. It was black as pitch that evening and he was seated at an old, converted gas station, waiting for the entertainment to begin (a bellydancer troupe).
He was so non-plussed by the whole scene, and with the sunglasses on at night he seemed even more detached, even aloof. I must admit that I felt intimidated by him as I photographed him. I tend to shoot first and answer questions later when doing street photography so I felt extra ill-at-ease.
When I got home and processed these images, I found that they were just a bit too much underexposed to save at the time (2011) but with subsequent iterations of LR introducing much improved noise reduction, I thought I'd give it a try.
What worked was to — again — hit the clarity tool heavily before, during, and after processing with Nik Silver Efex Pro. It took quite a bit of manipulation but I rather like the end result. You may have noticed that I'm into gritty textures.
The second was a photo of one of the bellydancers mentioned earlier. I learned that she was a new member of the troupe and was a bit on the shy side. I photographed her quite a number of times to find just the right expression. She smiled a lot that evening but I was looking for a more natural, non-smiling image. Standing in the doorway, I caught her for a brief moment just as I'd wanted to capture her.
Problem was, she was underexposed. And she had dark skin, on the caramel side of cocoa. Beautiful but technically not advantageous in that her skin didn't reflect as much available light as, say, my bellydancing niece, a blonde, blue-eyed guera.
Lightroom 5.7.1 to the rescue! I opened up the shadows, added contrast, adjusted the highlights, and then I was ready for the next step: Silver Efex Pro.
One of the things Silver Efex Pro does well is toning. I added a blue(ish) tone to the photo and then adjusted highlights and midtones even further. This time, I wanted to created an image where her skin was quite high key but everything else — her hair, her dress, the background — would all go toward the left of the histogram, without plugging up.
As with the older gentleman, it took several attempts to get it right. For instance, I kept blowing out her skin just a little too much. I finally brought back her skin to a level where I could barely see her pores. I think I nailed it.
Conclusion
Once unsalvageable photographs can now be brought back from the gaping maws of oblivion with Lightroom (or Photoshop, if that's your favorite tool). I can almost guarantee that you can find some good images in your folders full of culls, just as I have.
Take the time to re-examine these folders of lost images and see what you can come up with. And let me know what you save.
— Lawrence Standifer Stevens
Lawrence Standifer Stevens has been using a camera since he was old enough to shoot a squirrel climbing a telephone pole. He's been using Lightroom since v. 1.5 and Photoshop since v. 1.0. He also learned to drive at the age of 12 and is a nearly eight year cancer survivor. None of which is on his resume.