
Editing your own photographic work need not be an unbearable chore. Think of it in terms of uncovering hidden gems among all the costume jewelry in your old Aunt Ethel’s trunk in the attic after she’s passed away.
I use a four-step process (generally) and it doesn’t take nearly so long to do as it does to describe.
1st Pass
As Fast as Possible
I pretty much use Adobe Lightroom (LR) exclusively for my production editing, switching over to Photoshop (PS) only when the edit is complete and, then, only when I want to do some heavy lifting for which LR is just not the proper tool.
There are any number of workflows one can use in LR (and in PS) — and although some may very well be objectively better than others, it boils down to what you are most comfortable with. So, I’ll skip most of the specifics of dealing with both those programs and stick to the Mile-High View of the process.
That said, here’s an exception to my own damn rule about staying above the process: After importing images into Lightroom, I set my Filters (lower right corner, above the “filmstrip” of images) so that the Left and Center flags are active.

Adobe Lightroom Filter Settings to make rejected images disappear from view.
This may not be THE correct way of doing this but it works for me and that’s all I care about. What this does is allow me to not only Reject images but make them disappear from the filmstrip so I no longer have to see and deal with them. This is important because it frees up that part of the mind that constantly is asking, Accepted? Rejected? Evaluate? Move on? whether or not you’ve already done any of those things. Quite literally, it is a case of out of sight, out of mind. This saves a tremendous amount of mental energy and keeps the edit moving forward.
I make the filmstrip as large as possible, select the first image in the imported frames, and move forward as quickly as I can using the arrow keys. Using only a general impression of the image, I will Select or Cull an image. It needs to jump out at me to keep it. If an image does nothing for me immediately, I Reject it (using the X key) and move on to the next frame.
Use General Impressions Only
This is where you reject clearly out-of-focus images, shots with the subject in mid-blink, and goofy expressions. Plus, shots where your flash didn’t fire or recycle fast enough get 86’d, and operator error such as camera movement or incorrect exposure get the axe. But it’s really only the most obvious problems that will catch your attention. I tend to squint a bit to keep from being sucked into the minute details of a photograph.

Squinting demonstration. Do not try this at home. Trained professional on a closed course.
Eliminate, Don't Ruminate
The whole point of the
2nd Pass
Do It Quick but Use a More Discerning Eye
The second pass through your images is a bit more
Notice those things but be
Do A:B comparisons in this pass. After you have done a few, you’ll begin to pick up steam and start rolling through your images like the 5:13 from
A:B Comparison in Lightroom.
One thing I’ve learned about my own photography over the years is that the last frame in a sequence is more often than not the keeper. It saves a lot of time if you just go with the one that’s usually the best. You might be very different in how you shoot, however. As they say, YMMV.
3rd Pass
Slower Still - Grade Photos - Stars or Colors
In Lightroom, there are a couple of ways to rate an image. I occasionally will use colors but I mostly rely on the star rating. If I think it’s going to be a Select, I’ll just go ahead and give an image 5-stars.
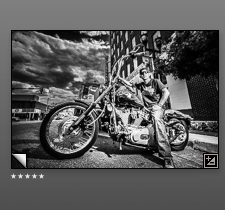
5-star rating
Sometimes, an image can still be used even though it’s not the absolute best of the sequence of shots of the same subject. I’ll drop the star rating to a 4- or 3-star rating but anything less than that is going to be rejected anyway, so I’ll simply press the X-key and reject them.
The lower star-rated images may not make the final cut but they may serve a purpose in stock photography. Or they may work better with a different crop.
4th Pass
Live with your decisions
Before you make the final pass, take a break. Unless you have to deliver the job right away, you can afford some time to “live with” your final candidates before the axe falls again. Think like a turtle not a hare. Make a slideshow and run it several times, hours or days apart. Or make small prints and put them up on a bulletin board or your wall.

Live with your photos for a bit. Do they stand the test of time?
Go through them often and look deeply into each one. Soon, the ones that want to hurl themselves onto a rocky
That’s when you start downgrading the photos or outright rejecting them. They will speak to you.
Before you know it, you’ll have finished your edit and all will again be right with the world. Now, go shoot some more. It’s not nearly so hard as you thought.
~ Lawrence Standifer Stevens
UPDATE 12/1/14: Joe Dantone, a
I hate being so picky, but I think what you described isphoto editing , not editing photos. If that is true, you might explain the difference.
And he is absolutely correct. I might. Next time.
Lawrence Standifer Stevens has been accused of far worse than having a name that's just way too long. He's a triple threat — he paints, he shoots, he writes, he does voiceovers, and he tells a remarkably boring story that often has listeners on the verge of piercing their eardrums. Wait. That's five threats. But who's counting? Visit his galleries and see his photography right next to his artwork. Amazing how he does that! Putting them so close together. Who'd a-thunk?